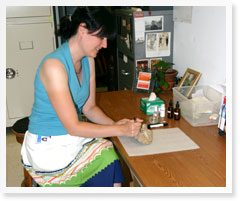
Labeling
The importance of having a catalog number on the specimen cannot be stressed enough. If a specimen becomes detached from its number, it has lost most of its scientific significance.
Labeling of specimens should be done in black ink; either India ink or an archival quality ink should be used. Ball-point pens, “permanent” markers, or other kinds of non-archival quality ink should never be used, as they have a tendency to degenerate, fade, or crack with time. If archival-quality ink is not available, pencil is the next safest option.

The catalog number forms the link between the specimen, its associated data, and any direct derivatives such as molds, casts and photographs or other illustrations. Specimens, molds, casts and illustrations all should all be labeled with the relevant catalog number, to avoid breaking this link. For example, if a mold that lacks a catalog number cannot readily be linked to a specimen, the time taken by a preparator to make that mold has effectively been wasted.
Another source of problems is incorrect transcription of catalog number during labeling, which also breaks the link between a specimen and its associated data. To minimize this risk, specimens should be labeled at the same time as the data is entered into the database, or when catalog cards and ledgers are made out, to enable immediate cross-checking.
Labeling is generally done by hand directly onto the fossil, but in some circumstances it may be more appropriate to create a printed label (e.g., printed directly from a databasing program) and attach it to the specimen or its container. This approach works well for specimens that are too small to label directly (the paper label can be placed with the specimen in a vial or gel cap), or where the surface of the specimen is too rough or fragile to take a written number. In general, however, it’s better to avoid stick-on labels because of the increased risk of the number becoming detached from the specimen.
Labeling Tip
It is helpful to make up a ‘kit’ of labeling tools and supplies so that the proper tools and materials are accessible for ready use. A kit should include:- archival pen
- acetone
- ethanol
- cotton swabs (e.g. Q-tips)
- Acryloid-B72 (Paraloid B-72) mixture [glossary link]
- white acrylic paint (e.g. Liquitex)
- specimen labels
Acid-prepared specimens, specimen lots and blocks with multiple specimens are all special cases for numbering. Additionally, there are some types of specimens where it might be appropriate to apply labels and, increasingly in use, barcodes. For tips on how to deal with these special circumstances please click here.
How do I label specimens?
For specific procedures click on some of the links below:
- Download the following procedures from the American Museum of Natural History’s Department of Paleontology:
- Assembling An Archival Marking Kit For Paleontological Specimens is a poster presented at the 2006 Society of Vertebrate Paleontology Annual Meeting by Amy Davidson and Samantha Alderson of The American Museum of Natural History, New York, NY and Marilyn Fox of The Yale Peabody Museum of Natural History, New Haven, CT is available as a pdf document online. Get the file.
- The National Park Service’s Museum Handbook, Part II: Museum Records Web Edition has an Appendix J on Marking collections and information more specifically on marking paleontological collections is available in the Museum Handbook, Part I: Museum Collections Appendix U on the Care of Paleontological and Geological Collections.


